Mail Merge is a means of merging data from an Excel spreadsheet or Access database into ADLForms. There are a number of steps to complete before forms can be merged successfully. Once the Mail Merge facility is setup correctly, it is then easy to merge your data into the forms.
A Merge Template must be configured for each form you wish to merge with.
For each form the steps to follow are:
Setup
Once the an ADLForms Template is configured it can then be re-used as many times as you like.
Merging
1. |
|
2. |
|
3. |
|
4. |
1. |
Open Microsoft Excel
|
||||||||
2. |
Open an existing spreadsheet with data already populated into it OR
|
||||||||
3. |
Create a new spreadsheet ready to accept data
|
||||||||
4. |
Save the Master Merge File
|
1. |
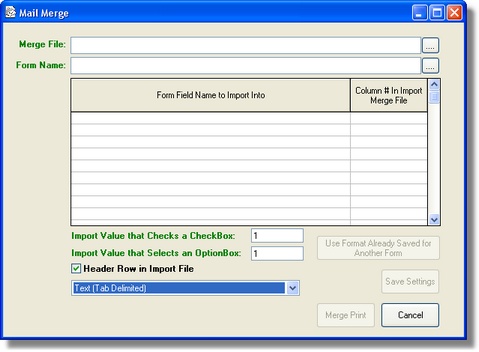
From the ADLForms 'Main Menu' click on the 'Mail Merge' button. The following screen will appear:
|
2. |
Click on the <....> button to the right of the 'Form Name' field.
|
3. |
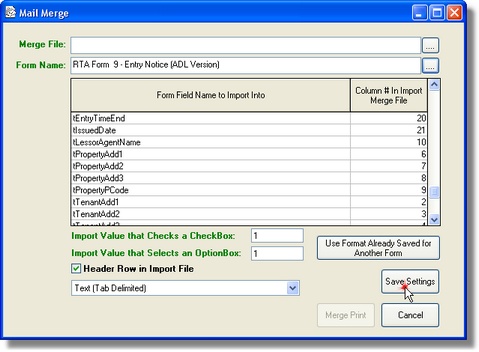
Select the form you wish to create a Merge Template for. The name of the form will appear in the 'Form Name' field and the table below it will be populated with all the field names for the select form in the first column of the table. The 'Use Format Already Saved for Another Form' and 'Save Settings' buttons will become enabled.
|
4. |
Referring to your Master Merge File spreadsheet (Or Merge File, if directly exported from MS Access) enter the column numbers within the spreadsheet that correspond with the field names (You do not have to associate all fields with a column in the spreadsheet)
|
5. |
Click on the <Save Settings> button. Your settings have now been saved for merging to this form.
|
|
Note: The 'Use Format Already Saved for Another Form' button has been provided for situations where two or more forms are, for all intents and purposes, the same form. This will rarely occur. Using this facility can be fraught with danger of used incorrectly. |
Creating a Tab Delimited Text Merge File
Merging a Merge File with a Form
1. |
From the ADLForms 'Main Menu' click on the 'Mail Merge' button
|
2. |
Click on the <....> button to the right of the 'Form Name' field
|
3. |
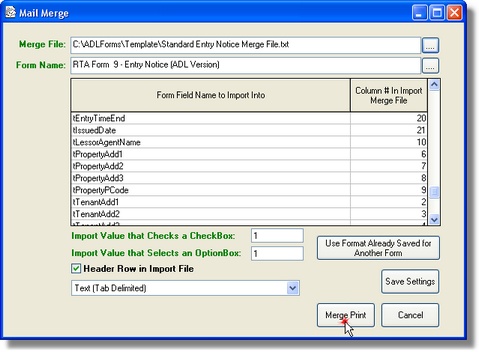
Select the form you wish to Merge to. If you have previously successfully saved a Merge Template for the selected form, all your settings will appear automatically.
|
4. |
Click on the <....> button to the right of the 'Merge File' field
|
5. |
Navigate to the Tab Delimited Text File which holds the data, in the correct format, that you wish to merge with this form
|
6. |
Click on the <Open> button. The name of the Merge File will appear in the 'Merge File' field and the <Merge Print> button will become enabled.
|
7. |
Click the <Merge Print> button
The standard 'Print Options' dialog window will appear
|
8. |
Adjust print options as required and click <Print>
|
9. |
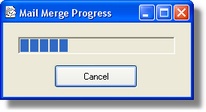
The 'Mail Merge Progress' bar will appear. You may click the <Cancel> button to stop progress at any time. Once progress has completed you will be return to the 'Mail Merge' window.
|
Additional Options
Header Row in Import File |
If you don't have a header row in your Import File then you should untick the <Header Row in Import File> check box or the first record will not print during the merge process.
|
File Format |
Under the <Header Row in Import File> check box is a combo box where you may select either 'Text (Tab Delimited)' or 'CSV (Test Comma Delimited)'. The default value is 'Text (Tab Delimited)' as this is the safest method. The 'CSV (Test Comma Delimited)' option is for expert users who know how to create such files.
|